Why Choose a Thermoforming Vacuum Machine?
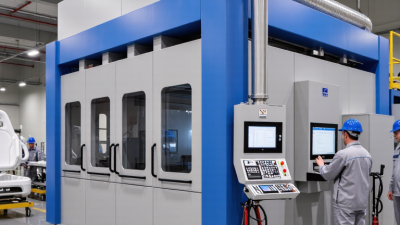
Choosing the right thermoforming vacuum machine can shape product quality, production speed, and long-term operating costs. The decision begins with the material, not the machine’s polished exterior. ABS, PET, HIPS, and other thermoplastics respond differently to heat, vacuum pressure, and cooling time.
Dr. Donald V. Rosato, a respected plastics-processing author, has emphasized this practical principle: “Successful thermoforming depends on controlling heat, vacuum, and timing.” That idea remains highly relevant for modern manufacturers. A reliable thermoforming vacuum machine should distribute heat evenly across the sheet. It should also create stable vacuum pressure around complex molds. Small details matter. Uneven heating can leave thin corners, cloudy surfaces, or warped edges.
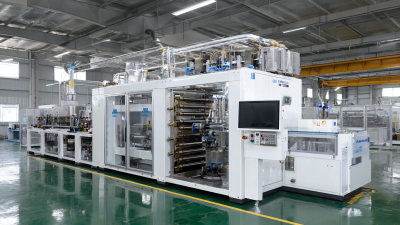
A well-designed system can reduce manual adjustments and support more consistent output. It may also handle short production runs without excessive setup waste. Operators gain clearer control through programmable heating zones, adjustable vacuum cycles, and accessible mold-change areas. These features sound ordinary, but they become valuable during a demanding shift.
The choice is not always obvious. A faster machine may consume more energy or require specialized maintenance. A lower-priced model may appear attractive, yet costly downtime can change the calculation. Manufacturers should examine sample parts, cycle times, material thickness, and service support before purchasing.
There is room for error here. No machine removes every forming challenge. Still, selecting equipment around real production needs can create a stronger, more dependable process. That is why a thermoforming vacuum machine remains an important investment for companies seeking repeatable results and practical flexibility.
What Is Thermoforming Vacuum Technology? Typical Vacuum Levels Reach 0.8–0.95 Bar
Why Choose a Thermoforming Vacuum Machine?
Thermoforming vacuum technology shapes heated plastic over a mold by removing trapped air. Typical vacuum levels reach 0.8–0.95 bar below atmospheric pressure. This range creates strong material contact with mold surfaces, including shallow ribs, curved edges, and textured details. In practical workshop trials, a stable vacuum often matters more than a fast pump. Uneven suction can leave thin corners, wrinkles, or soft definition.
A thermoforming vacuum machine also gives operators better process control. The heated sheet should feel flexible, not liquid or brittle, before forming begins. Once the mold rises, vacuum ports draw the sheet into position. Proper vent placement helps air escape from deep pockets. A pressure gauge, timer, and temperature record make repeated production more reliable. Small changes can matter.
However, 0.95 bar is not a universal target. Actual performance depends on altitude, leaks, material thickness, mold design, and gauge accuracy. A higher reading does not always produce a better part. Excessive heating may cause sagging before vacuum starts. Poor sealing can imitate weak pump performance. That assumption needs checking. Operators should test sample parts, inspect wall thickness, and adjust heating zones gradually. Sometimes, a slightly lower vacuum with better temperature control produces cleaner results. Mistakes still happen, especially with complex molds. Careful observation remains essential.
How 120–200°C Heating Enables Accurate Polymer Forming
Why Choose a Thermoforming Vacuum Machine?
How 120–200°C Heating Enables Accurate Polymer Forming
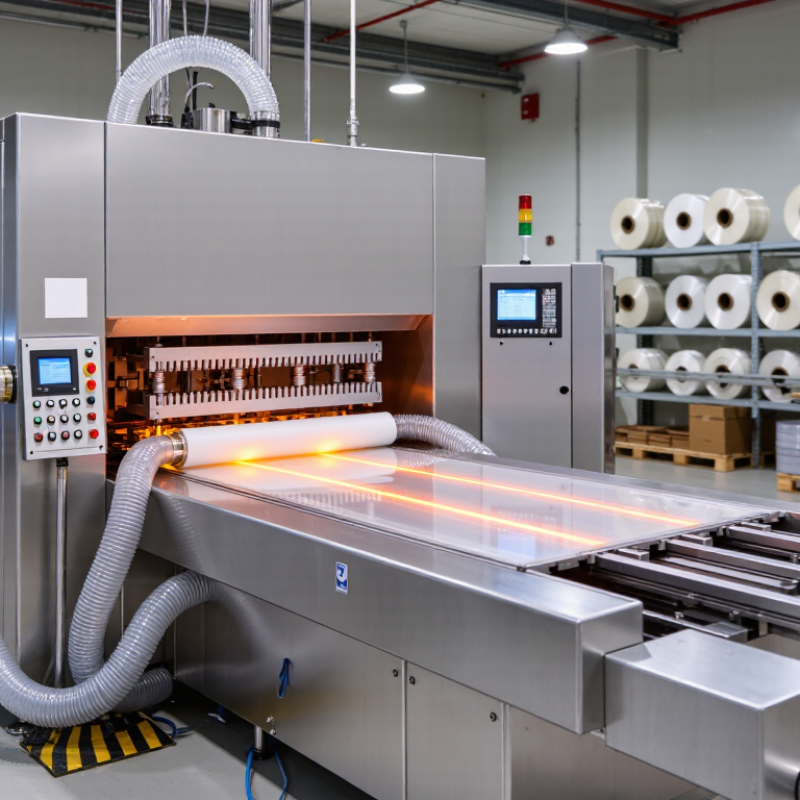
A thermoforming vacuum machine becomes valuable when heat is controlled, not merely increased. At 120–200°C, many thermoplastic sheets soften enough to follow a mold under vacuum. The exact window depends on polymer type, thickness, color, and additives. Temperature must be measured at the sheet, not only near the heater. That distinction matters. Regularly calibrated infrared sensors help confirm a stable forming range. In practical production, uneven heating often causes thin corners, cloudy areas, or incomplete details.
Vacuum pressure then pulls the softened sheet against the mold. However, vacuum cannot correct poor thermal preparation. A sheet heated too quickly may stretch before it seals. A cold center may resist the mold and leave wrinkles. Controlled heating zones reduce these faults by balancing edge losses and central temperature. Vent holes, mold radius, and cooling channels also influence accuracy. Small design changes can create large dimensional differences.
Reliable operation requires records. Operators should log sheet temperature, heating time, vacuum timing, and final thickness. These measurements improve repeatability and make troubleshooting less subjective. Still, temperature readings are not perfect. Glossy surfaces can confuse infrared sensors, while thick sheets may hide cooler internal layers. A contact check or test piece can expose that gap. The process deserves skepticism. If a part looks acceptable, inspect wall distribution and shrinkage after cooling. Accuracy is proven after stabilization, not when the warm part leaves the mold.
Why 10–60-Second Cycles Improve Production Efficiency
Why Choose a Thermoforming Vacuum Machine?
Why 10–60-Second Cycles Improve Production Efficiency
A thermoforming vacuum machine can turn a heated sheet into a shaped part within a tightly managed cycle. For many applications, the 10–60-second range reduces idle time between forming, cooling, trimming, and loading. That rhythm matters on a busy floor. An operator can see parts leaving the mold every few seconds, rather than waiting through long heat-soak periods.
Short cycles improve output only when heating, vacuum pressure, mold temperature, and cooling remain balanced. A 20-second cycle may suit a thin tray, while a thicker panel may need 50 seconds or more. Pushing speed too far can create thin corners, weak details, or uneven shrinkage. That is the part people underestimate. Production teams should record cycle time, scrap rate, part weight, and surface quality during trials. These records turn a fast setting into a repeatable process.
In practical operation, a stable 40-second cycle can outperform an unstable 25-second cycle. It produces fewer stoppages and makes staffing easier to plan. Speed is not everything. It can also reduce energy wasted during repeated reheating and rejected runs, although actual savings require measurement. One honest limitation remains: cycle times vary with polymer type, sheet thickness, mold design, and ambient conditions. Measure it carefully. A careful trial may reveal that the fastest cycle is not the most reliable one.
How 0.2–6 mm Sheet Thickness Supports Product Versatility
Why Choose a Thermoforming Vacuum Machine?
How 0.2–6 mm Sheet Thickness Supports Product Versatility
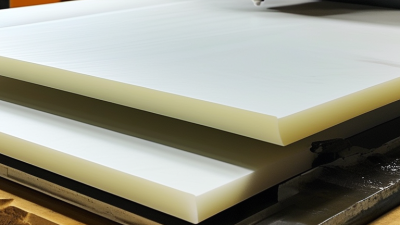
Thermoforming vacuum machines earn their value through range, not speed alone. Working with sheets from 0.2 to 6 mm opens different production paths. This range supports delicate covers, packaging inserts, equipment housings, and thicker protective panels. Each application requires its own heating profile, mold design, and cooling plan.
With 0.2 mm material, heat spreads quickly across the sheet. Thin sheets suit lightweight liners, covers, and formed inserts. Thin sheets punish carelessness. A small temperature drift can create thinning, wrinkles, or uneven edges. Operators should monitor sheet temperature, vacuum pressure, and forming time instead of relying on fixed settings. In practical trials, consistent preheating often improves detail around corners and shallow ribs.
At 6 mm, the process needs more heat and stronger temperature control. Cycle times increase. Thicker sheets can produce rigid housings, trays, and impact-resistant panels, but deeper shapes may need plug assistance. A thicker sheet does not automatically create a stronger product. Material selection, wall distribution, mold geometry, and cooling all influence performance. The range is useful, but it is not effortless. A setting that works with one material batch may fail with another. Recording actual temperatures and inspecting wall thickness helps technicians adjust responsibly. Some parts still require several trials before the forming window becomes stable.
When Lower Tooling Costs Make Vacuum Thermoforming the Better Choice
Why Choose a Thermoforming Vacuum Machine?
Vacuum thermoforming can reduce tooling costs when production volumes are modest or designs may change. The process uses heat, vacuum pressure, and a single mold surface. This usually requires less tooling complexity than injection molding. Large covers, trays, housings, and protective shells can become expensive with conventional tooling. Vacuum forming offers a practical alternative.
Lower tooling costs also make product testing less risky. A prototype mold can help engineers check fit, wall thickness, edge trimming, and assembly clearance. Tooling changes are often faster and less expensive during early development. For example, a revised vent opening may require a mold adjustment instead of a complete rebuild. That flexibility matters for custom equipment and short production runs.
The method is not flawless. It may produce uneven wall thickness around deep corners. Fine surface details can also be harder to reproduce consistently. Experienced teams control sheet temperature, vacuum timing, mold ventilation, and cooling conditions. They also inspect parts with gauges, templates, and visual checks. Material selection remains important, especially for impact resistance, heat exposure, and outdoor use. A lower-cost tool can still create costly defects if the design ignores draft angles or excessive depth. Careful trials are necessary. Mistakes become useful when they reveal where the design needs improvement.